5S - What is it and how can it help me?
5S is an approach to simplifying your work or personal spaces and reducing waste by having everything:
· in the right place,
· at the right time,
· ready for use.
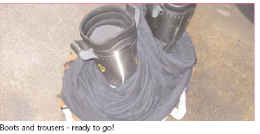
How Firemen use 5S!
Why do this?
· the space will look and feel better
· it’ll be easier to work in
· you’ll decrease mistakes & errors
· you’ll reduce risk.
It’s not just a “good tidy-up”! It’s about having an area where:
· things are left ready for the next person
· the process for doing this is agreed and understood by everyone
· changes are maintained and become second nature
· everyone understands why things are done the way they are done.
This process makes the areas work for us so that we don’t have to work around them. Very often our environments hinder our efforts to work efficiently - 5S helps turn this around.
5S is a method for organizing an area, especially a shared area (like an office space or a ward), and keeping it organised. It’s a visual system for improvement which helps all staff to create and maintain an organised, clean, high-performance space. It forms the basis for work on standards which will enable you to measure improvement.
5S targets workplace morale and efficiency. The idea is that by assigning everything to a location, time is not wasted looking for things. Also, it is really obvious when something is missing from its designated location.
Part of the benefit of 5S comes from the team deciding what should be kept, where it should be kept, and how it should be stored. This decision-making process builds a clear understanding in the team about how work should be done and that process also creates ownership of the process and the decisions. The underlying approach is the need to understand the detail of all activities in the workplace in order to understand the whole system so it forms the basis for quality and safety.
The 5Ss stand for:
1. Sort
This involves going through all the items in the area and keeping only essential items. Everything else should be discarded or stored.
This is a team-based activity for all those who work in the area.
· Remove all items which are not used in any area - ward, cupboard, office, corridor, reception, theatre, etc. This could be outdated materials, broken equipment, redundant equipment, old files on the computer etc.
· Get staff to tag all items which they don't think are needed: this improves understanding about need and use.
· Classify all equipment and materials to help decide if it should be removed. You can use a red post it note for things that definitely must go and a yellow post it note when you’re not sure.
· After a few months, if you haven’t used the yellow tagged items, you can confidently dispose of them too.
2. Set in order
‘Set in order' is where you get to classify items by type and by frequency of use.
· Put frequently used items close at hand
· Group items by type
· Arrange items visually in the best position for day-to-day work, for example arrange files so you can immediately see if a file is missing or has been replaced incorrectly.
There are three parts to Set.
Step 1 - Lay Down the Lines - the basic Rule is “If it casts a shadow, it gets a border.”
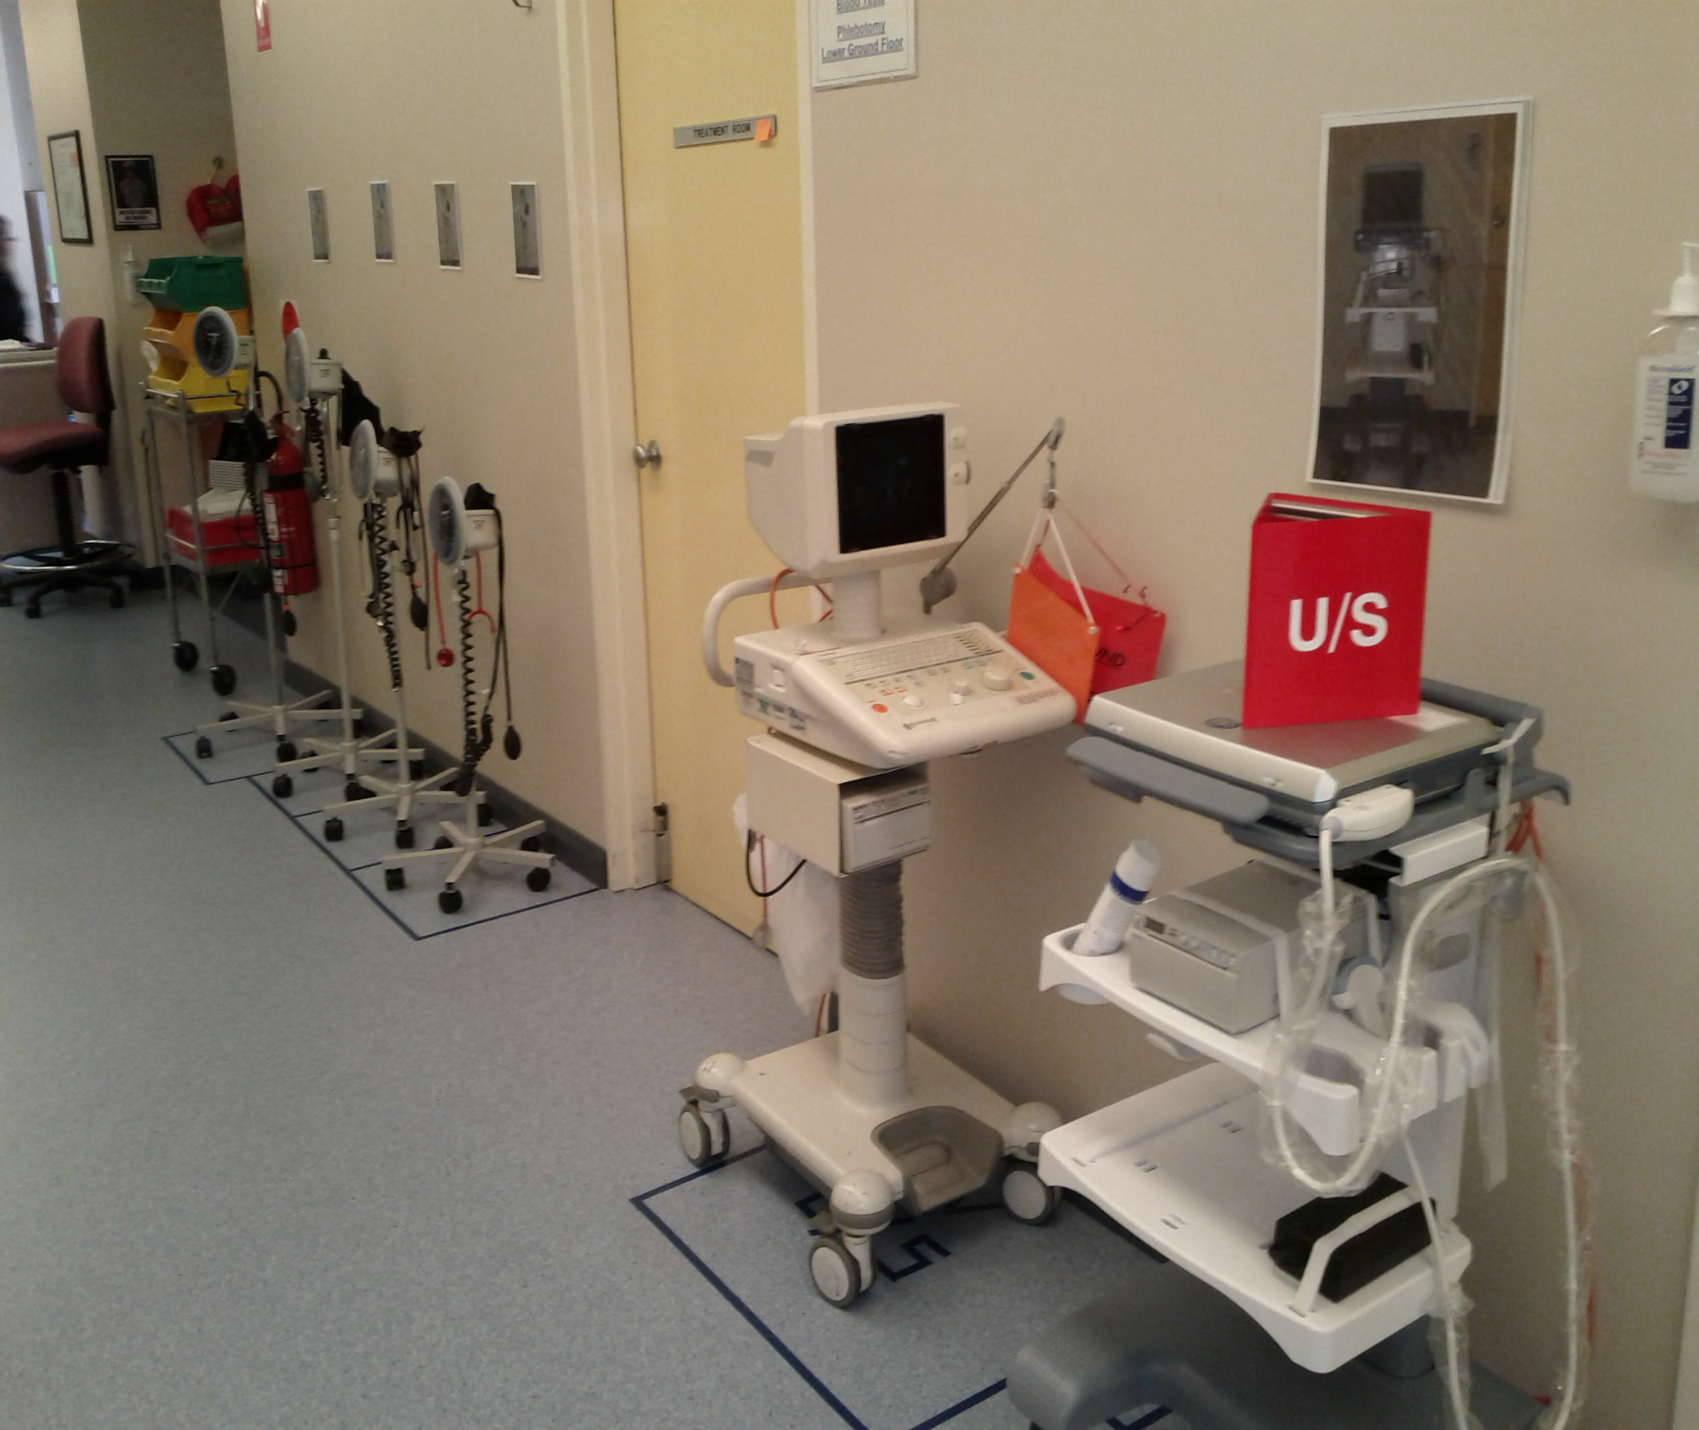
If it casts a shadow, it gets a border. And a picture on the wall to show what lives there.
Step 2 - Set minimum and maximum levels for stock - Green = maximum, Red = minimum
Step 3 – Create flow - arrange items in the order that they are used
We’re using the principles of Visual management which means that we don’t just show where something should be, the system can also let you know if something is missing.
The picture below shows portable monitoring equipment that is stored in an Emergency department. The green ‘shadow’ indicates where they should be placed. It is easy to see that one is in use.
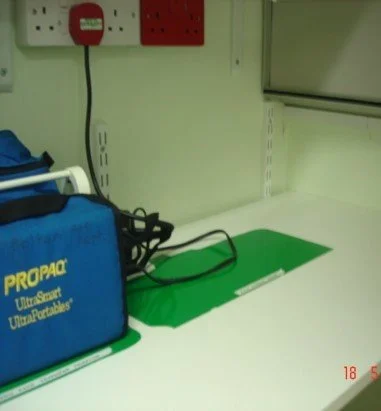
It’s easy to see that one is missing.
The visual nature of the revised system is particularly important, so you may want to use colour coding. You should be able to see at a glance if something is not there. This reduces the opportunity for error and saves time locating missing items such as a patient's notes.
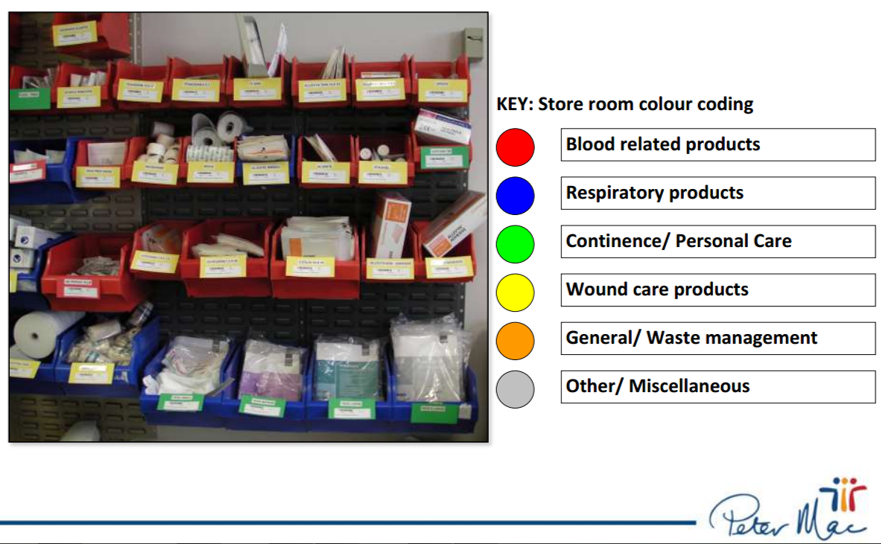
Colour coding of supplies
My colleague used to say “Make the walls and the floors talk to you” and that’s a great way to think about it. The next picture shows how labelling makes the floor “talk”.
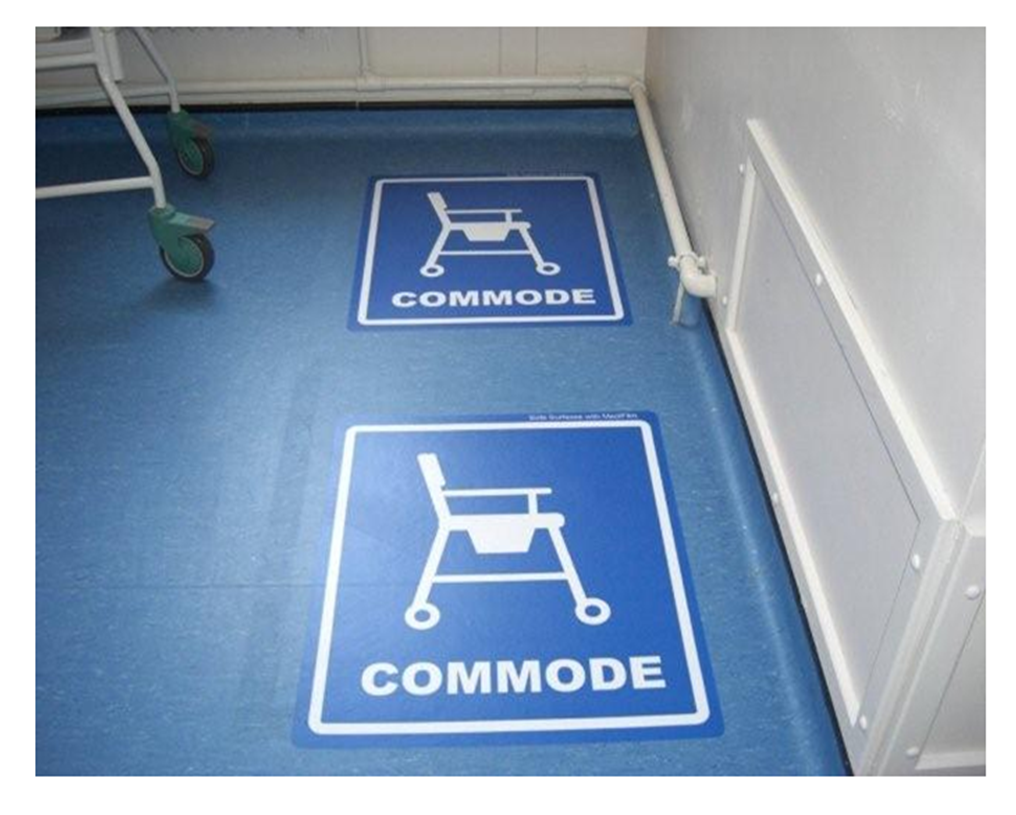
It’s easy to see what lives here.
3. Shine
Once you have arranged the items in your work area, it is tempting to move onto another area and not look back. But you want to ensure that everything stays neatly organised and tidy so having cleaned the area thoroughly, you need to plan how this is going to be done long term.
Involve Facilities if changes are needed such as painting, new shelves etc,
Keep equipment ready for use - plugged in if necessary to re-charge, cleaned after use and ready to go, recalibrated when required.
Discuss and understand maintenance of equipment and stock ordering or top-up systems.
4. Standardise
The next step is ‘standardise'. Standardisation saves time as it allows routine tasks to be done in a routine way. It also creates a framework to audit against and thus ensure Sustainability.
· Agree the standard
· Document the standard
· Communicate the standard
· Follow the standard
· Audit against the standard
5. Sustain
The final step is maintaining the standards.
Once the previous 4Ss have been established, they become the new way to operate. Maintain the focus on this new way of operating, and do not allow a gradual decline back to the old ways of operating by auditing against the standard.
When an issue arises such as a suggested improvement, a new way of working, a new tool, or a new output requirement then go back and review the first 4Ss.
· Develop a 5S audit sheet as a team
· Create an Audit Planner to keep track of your audits
· Agree who will do the audits on an ongoing basis
· Keep the Audit in the area
· Display and communicate the audit results.
When does it work best?
5S reduces the opportunity for variability in activities by ensuring that everything needed at each step of the process is easily available. This means that, if there is a defect in a particular step, it is easier to see e.g. if a tray for an operation is incomplete, this signals a need to stop and solve the problem. Through the involvement of your staff, who design the 5S system in their own workspace, 5S can also reduce the risk of injury.
How to use it
Always start by communicating to the relevant staff and anyone else who may be affected, what is going to happen. This could include the unions, stores staff, management, health and safety, estates personnel, maintenance engineers etc. You may also want to include some of these groups in the activity as they bring a fresh pair of eyes to the project.
Before you start, take photos of the area: these will act as ‘before' and ‘after' measures of any improvements. It may also focus effort on the place which staff want to tackle first. You can also show other people what you have done.
Let’s look at what others have done
Keeping track of patient’s property was a real problem for this unit. But with a good system, it’s easy.
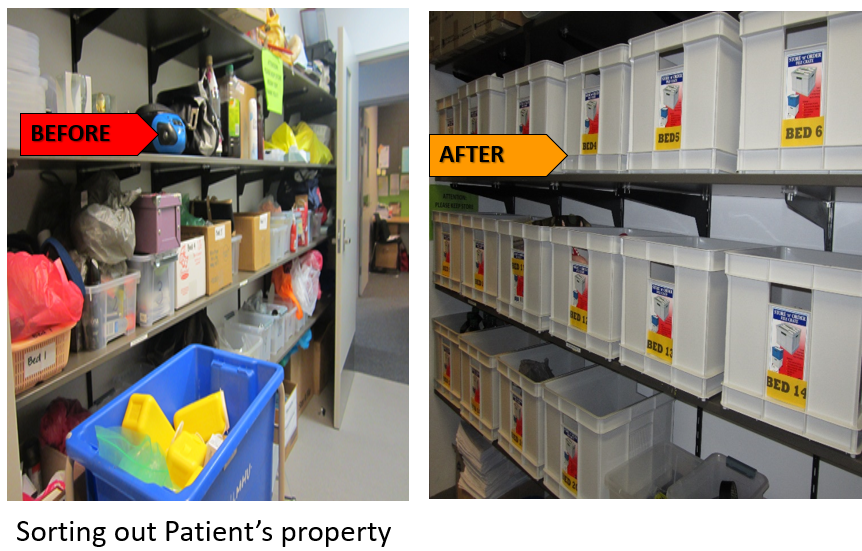
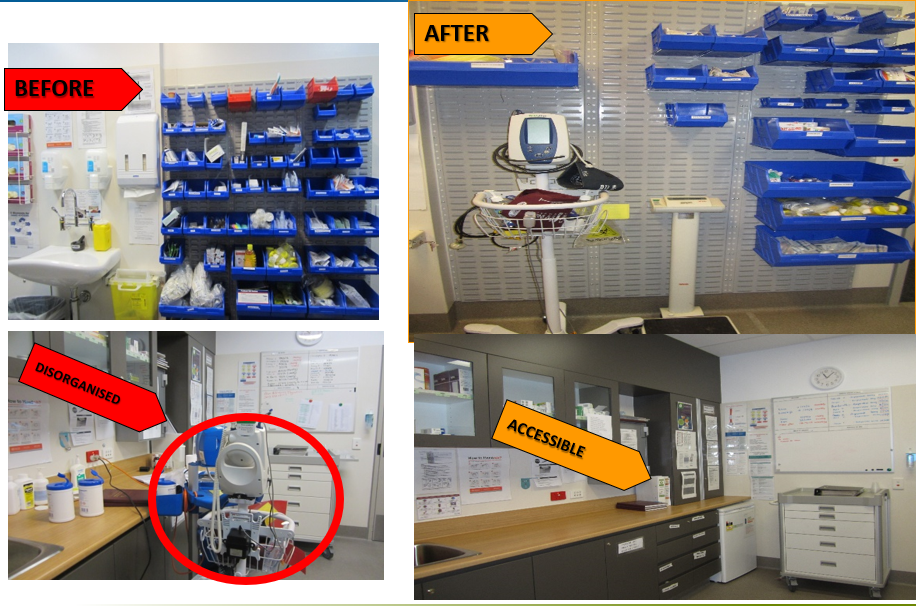
These pics show how “right sizing” inventory creates space and clearing away clutter gives access to benches and equipment.
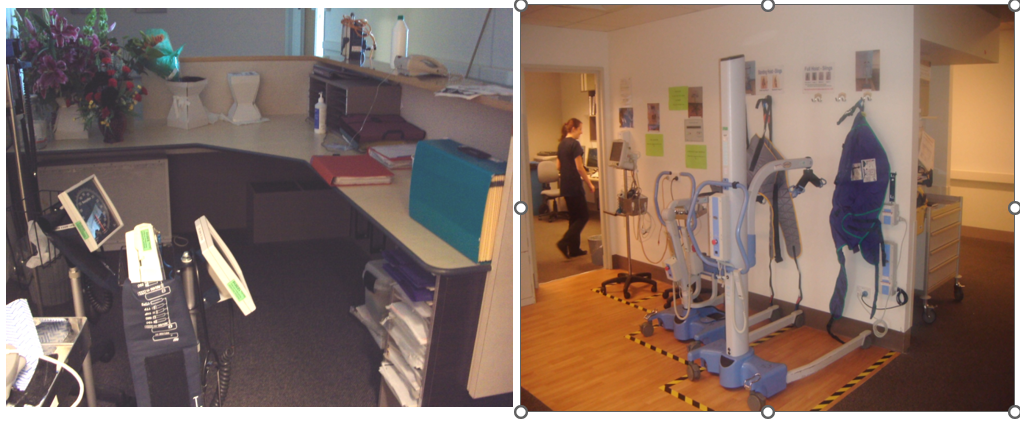
This was a big change to the functionality of the ward.
This is one of my favourite changes. This ward had a second nurses’ station which ended up being used as a dumping place for storage. What they really needed was a hoist bay so the nurses’ station was pulled out and a bay created. And this change saved 40 hours/week (5 shifts)!!
What next?
Steps 1 and 2 kick start the process. Steps 4 and 5 are extremely important as they are what turns the process from being “a good tidy-up” into a system.
You could allot time to ‘Shine' on a daily basis. For example, include a routine to check stock - the volume of material you need in a work area will depend upon how much you use daily, weekly or monthly (the demand).
If you are implementing a process like this across an organisation, you will need to agree that decisions by the first teams to do the work are implemented across the whole organisation - this makes it easier for staff who work in more than one area. Look out for problems that prevent you from sustaining the improvements you have made. If you do identify problems, try to identify the root cause using five whys and cause and effect diagrams for example. You can also use small tests of change to work out the best way to solve them.
Interested in 5S? Want to know more? Get in touch - I can help!
References
Bicheno J (2004) ‘The New Lean Tool Box' PICSIE Books, Buckingham.
Osada T (1991) ‘The 5S's Five Keys to a Total Quality Environment' APO.
Rich N, Bateman N, Esain A, Massey L and Samuel D, (2006) ‘Lean Evolutions' Cambridge University Press, Cambridge.
Rich N (1999) ‘Total Productive Maintenance: the Lean Approach' Liverpool Academic Press, Liverpool.